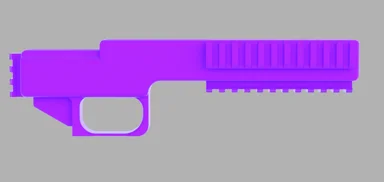
dd19.2 with forged carbon side plates w/ molds to make the plates
Print The mold and compression plates in PETG as epoxy does not want to stick to it as badly as other filaments. print at 100% infill for everything PETG related with a grid infill and two outer layers including two top layers.
The compression brace should also be printed in PETG.
Print the frame in PLA+ with two outer layers four top layers and three bottom layers with 100% infill rectilinear.
To make the carbon parts use an epoxy release agent on the mold, all of its surfaces, and the bottom of both compression plates.
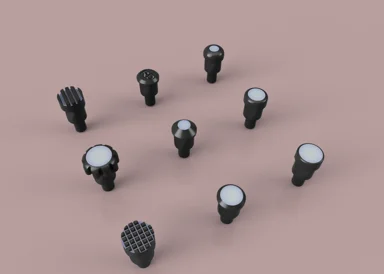
After this wrap a 12K strand of carbon fiber filament around all of the pegs for the holes in the same way a helicopter blade is wrapped. next put down a layer of 1 in carbon strands that have been worked apart by hand until they resemble black cotton. Make sure to get this in the corners and all of the pockets that will create the texture on the bottom. The next step is to add the epoxy, after adding it make sure that it is worked into all of the carbon fiber that is already in position and that there are no remaining air pockets in the carbon fiber - I use a dental tool to do this. I then lay down another very thin later of regular chopped carbon tow working it very hard into the layer below it. The next step is to pack the rest of the mold where the part will be compressed with a 50-50 mix of carbon fiber and fiberglass as forged carbon fiber does not like to adhere to anything. Make sure that any build up occurs in areas that will not spill out into the sides of the cavity where the compression plate will lock down onto. next up is to put the compression plate on the top of the mold and slowly apply pressure until you think you're around the thousand pound mark. It is very important that pressure is applied equally over the entire surface of the mold and the compression plate. I used West systems epoxy, home Depot fiberglass, and cheap carbon fiber off of Amazon. To get the strands I pulled the long tow off of the sheet at the edge. I let everything sit for about 24 hours and then remove the compression plate. I then use pliers to snap off the edges above the interior shelf. I hit the back of the mold with a blowtorch to make it warp and bring it to a point where it is flexible. Once it is fully flexible and all of the edges are cut off or broken loose I grab one end of the mold with a set of needle-nose pliers and then roll the hot PETG off of the carbon part. It sounds complicated but after you do it once it is very easy.
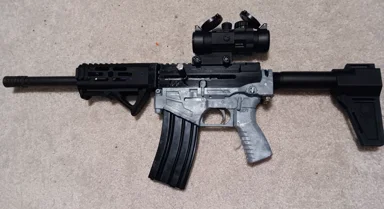
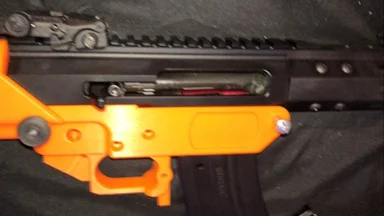
Then I slide the compression block into the receiver and epoxy the sides on. I use cut off paper clips as shims to fully fill out the holes and make sure that there is no space for any imbalance in tolerancing. once everything is in place I use a rubber jawed clamp to apply even pressure without applying too much and ruining the project. I let this sit until it is cured and remove any leftover epoxy. if you wipe the epoxy as you clamp the cleanup will be a lot easier. Make sure not to get epoxy into the interior of the frame as it is a real pain in the ass to pick out later. after this step install the FDMA 19.2 rail system- I went with Aves Rails.
The point of this project and this page is to expand The ideas and processes that we can use 3D printers for. I've done a lot of testing and this is the only 3D printed gun know I can trust for years as the testing was exhaustive before the first prototype was even produced.
LBRY Tags: dd19.2; fmda; forged carbon; 2a; chairmanwon

Unseenkiller - FA Plug (un-tested forward assist plug)

*tested* Bidens Bane large rear post left side charging - NO FA / NO FRT 9/1/24 update

AR lower mini30 mag well for BCA side charging 7.62 upper BETA