View this release
Alternative links
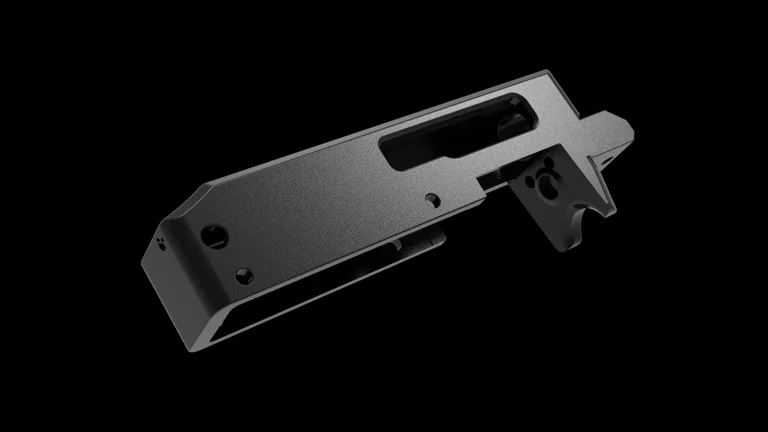
L-X22 Model I, Minimal (10/22) Receiver: Laffs Dynamics
Minimalist version of the original Laffs Dynamics L-X22 (10/22) rifle receiver.
Created for ease of manufacture if one simply wants a barebones 10/22 compatible receiver for recreational use.
Slightly less material than the original design, less support material is needed, less to go wrong during printing.
Printer Used: Ender 3 V2
Filament Used: PLA+
Print Settings:
Extruder: 218C
Bed: 58C
First Layer Print Height: .20mm
Standard Layer Height: .16mm
Wall Thickness: .40mm
Wall Perimeters: 7+
Infill: 75%+
Support Material Percentage: 25%
Print the receiver upside-down.
Hardware Needed:
1x Barrel
1x Ruger 10/22 Receiver Takedown Screw
1x V Block
2x V Block Bolts
1x Buffer Pin
1x Complete Trigger Pack
2x Trigger Pack Retaining Pins
1x Complete Bolt Assembly
1x Charging Handle/ Guide Rod Assembly
Assembly: (READ NOTES BELOW BEFORE ASSEMBLY INSTRUCTIONS)
1) Remove all printed support material
2) Sand the bolt raceway and barrel channel.
3) After sanding the barrel channel, press the barrel shank into the receiver.
4) Install the charging handle and bolt. This is the best time to apply lubricant to the bolt and raceway.
5) With the bolt fully forward, check to be sure the extractor matches the notch in the side of the barrel shank. If not,
slightly pull barrel outwards, twist until the extractor & notch match, then press back in.
6) Install the trigger pack, and press in the retaining pins.
7) Press the buffer pin though the back of the receiver.
8) Place the V Block on the barrel, and drive the bolts through the block, into the channels. Apply blue loctite beforehand.
9) Install the complete receiver assembly into a 10/22 stock/chassis. Drive the takedown screw from the bottom of the stock,
and into the receiver.
10) Install a compatible magazine, then function check. Be sure a round feeds from the magazine, and extracts from the chamber.
11) Take time to dry cycle the bolt around ~ 100 times to aid in break in.
The original L-X22 reciever can be found here:
https://defcad.com/library/1d381674-593d-49c9-a5d5-ad1fd150c139/
(Free on Odysee) https://odysee.com/@LFRF:d/LX22:c
LBRY Tags: 3d printing; firearms; 10-22; minimal; ruger; c:disable-reactions-comments; c:disable-slimes-video; c:disable-slimes-comments; c:disable-reactions-video