View this release
Alternative links
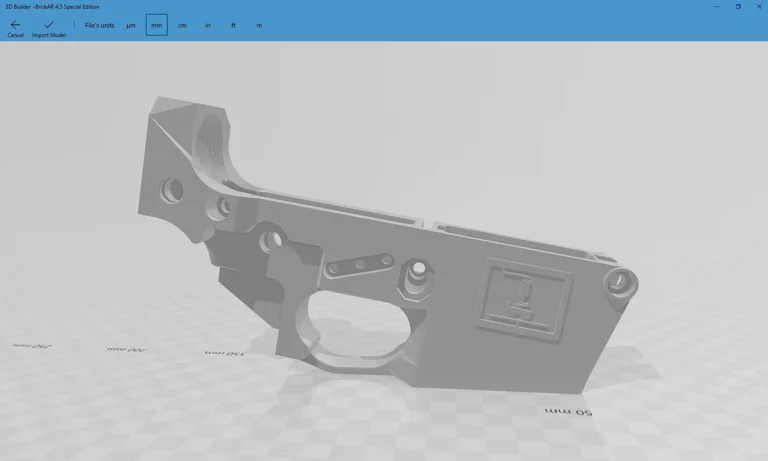
This is the official release of the BrickAR 4.5. It has a few new features
and improvements over the 4.0 release.
1. Recesses in the takedown holes so you can use standard takedown pins if you like.
It still won't make use of the detent pins that retain the pins, but you will at least
be able to use the standard pins. You'll still be able to use the quick release or clevis
pins if you like though.
2. Slightly modified the profile of the forward assist notch on the buffer tower. Hopefully
this will help with that being a weak spot. Nearly everyone who has managed to crack the
buffer tower on a BrickAR did it right in that notch. This should still give adequate clearance
for the forward assist on most uppers. If you still have clearance issues, slightly sand that area
until (and ONLY just until) it fits.
3. Recessed the hammer and trigger pin holes so standard pins fit flush, and also added a
channel between the recesses so you can use anti-walk or anti-rotation pins. There are also pin
lock parts included in the files. You can print one of these for each side and attach it with an M4x10mm
countersunk screw (I wouldn't recommend going any longer than 12mm or you risk interfering with the FCG).
4. Recessed the right side so ambidextrous safeties will now work.
I hope everyone likes these improvements. Below are my recommended print settings:
Printer: Any FDM printer with at least a 200x200mm bed and 100mm height. I print all of mine on a
Tronxy P802M, one of the cheapest printers you can get.
Print orientation: Exactly as it imports, with the bottom of the magwell and trigger guard flat on the bed.
DO NOT, I repeat DO NOT follow the old advice of printing at 45 degrees to the bed. This lower is specifically
designed to make the best possible use of the layer lines. Printing it at 45 degrees will actually make it
more susceptible to damage. The ONLY other good option is to flip it upside down and print with the front lugs
and the tip of the buffer tower touching the bed. This makes for a rougher top surface where it mates to the
upper, and makes cleanup of supports in the trigger pocket harder, but will give a much nicer bottom surface.
Layer height: .12 to .20. There's really no advantage to going lower, but you can go up to .3 if you
REALLY don't care about surface quality. It could also cause fitment issues.
Speed: I generally print anywhere from 35-45mm/s, but this will depend on the capabilities of your printer.
Supports: Touching bed only SHOULD work, however you'll get some poor quality in some of the overhang
areas around the mag catch and channel for the bolt catch pin. I generally recommend doing supports
everywhere but putting support blockers in ALL of the round holes to make cleanup easier.
Material and temps: This is ENTIRELY up to you and what your printer is capable of. I designed this lower
for the absolute lowest common denominator. I printed and tested in in some cheap PLA (not even PLA +)
that I got on Amazon. Even so, it survived 91 rounds of 5.56 and 20 rounds of .300BLK with zero issues or
damage in my first live test of it.
Any other questions or feedback, be sure to contact me in any of the 2A 3D printing Facebook groups that I'm
a member of. If you don't know my name on there, just ask around, someone will point you in the right direction.