View this release
Alternative links
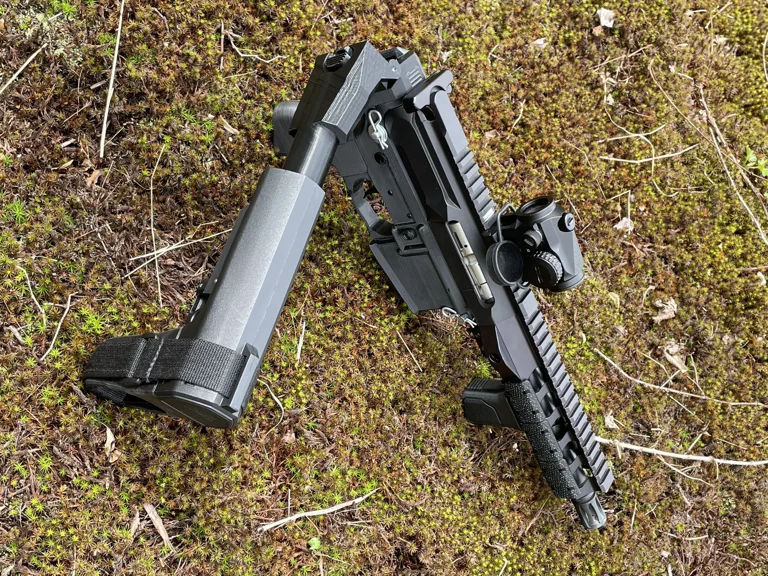
AR-22 Hinged Lower Receiver. This is a dedicated Lower receiver for use with a CMMG 22lr conversion Bolt. I remixed this from the DS1913, as well as the AWCY Scorpion, and a printed Buffer Tube.
I printed the Lower receiver at a 45 degree cant, with the ejection port side facing "down" (as shown in the picture) and i printed the hinged buffer tube at 30 degrees from upright. this was done in order to have full encirclement of any holes in each layer for strength.
this is my first attempt at "designing" (mainly remixing) anything, so i'm open to any suggestions/improvements. as stated in the Post-Printing, some modification needs to be done, and i'm sure someone better at the software could design so it prints better from the get-go, without needing as much post-printing
i currently have 75 rounds through this build with no issues (trying to conserve ammo).
that being said, this is a firearm, and i am in no way liable for anything that might go wrong, as i cannot control your printer settings, etc.
Printed on my Artillery Sidewinder X1
Printed in PETG
extruder at 245C with buildplate at 80C
Sliced in CURA
Supports: Touching buildplate
i printed these at 85% infill, but you could always increase that up to 100%, it's a difference of about 4g of filament for each main piece
i previously printed the DS1913 lower in PLA with no issues, so this should all work printed in PLA with the appropriate settings for your printer
Parts Needed:
AR15 Lower Parts Kit, Fire Control Group, Pistol Grip
ANOTHER AR mag release spring
1 - 1/8" x 1" roll pin
2 - 1/4" x 2" universal clevis pin
2 - 1/4" hitch pin clip
1 - 1/4" flat washer
1 - #8-32 2" machine screw
SAND all the support interface areas smooth
ASSEMBLE the Lower Receiver
if you have a tap and die set (you really should), tap the hole for the pistol grip screw (1/4"x28)
-note, i used the clevis pins to join the upper and lower, not the parts from the build kit
-once i figured out which hole on the clevis pin the hitch clip went through (the 3rd hole for me) i cut the excess pin off with a dremel.
-i used the flat washer on the rear takedown pin between the body and the hitch clip.
POST PROCESSING
for my upper receiver/handguard, i had to sand a little bit off the front of the body by the pivot pin holes to mate the receivers, YMMV
i then sanded the top left corner of the hinge area of the lower receiver to round off the corner to allow easier manipulation of the Charging Handle (i couldn't figure out how to do this on the computer... i'm still learning)
use a 1/8" drill bit to drill out the hole in the buffer adapter
start tapping the roll pin into the hole
insert the additional mag release spring into the hinge locking button
set the button
DON'T drive the roll pin all the way in yet, you'll want to make sure the button is able to actuate with the pin about halfway in.
IF the button won't actuate smoothly, pull the pin back out using pliers or vice grips, remove the button and file down the flat face of the button.
keep checking until the button operates smoothly
if you have a tap and die set (you really should), tap the holes of the hinge for a #8-32 screw
insert the screw from the bottom of the hinge. it should come just flush of the top of the hinge. (i also couldn't figure out how to cut a recess for a locking nut into the hinge, but i haven't experienced any screw backing out)
LBRY Tags: 22lr; 3d printing