View this release
Alternative links
Remix of Glock Recoil Spring Tool by rhadsall - https://www.thingiverse.com/thing:3854714
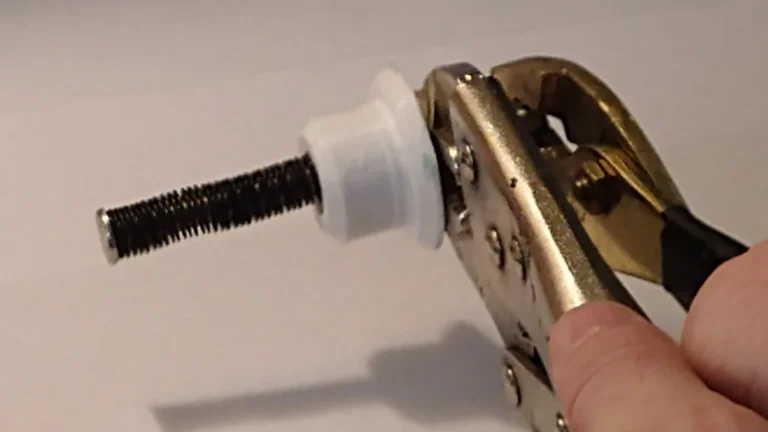
Not shown in photo - there is masking tape wrapped around the jaws of the vise grip pliers to prevent raising burrs on the guide rod. The other pair of pliers are brass and don't damage most steel parts.
I needed to change the spring on a Rival Arms guide rod for a Sig P320. The screw at the end of the Rival Arms guide rod did not have a hex socket, so the Glock tool would not work. It was too long to allow me to get a grip on the screw. I also changed the shape of the tool, so that it would not require support material.
The tool still works for aftermarket Glock captured guide rods and also works with factory M&P guide rods.
There is very little margin of error on these. If the through hole is too large, then the tool can let the spring slip, and it will shoot through the tool, potentially injuring the user. As printed, on a calibrated printer, the hole will probably be too small. You will likely need to drill out the hole to the proper size, or adjust scaling in the slicer so that it works for your application. Wear safety glasses whenever you are compressing the recoil spring with the tool.
Use at your own risk. I am not responsible for any injuries or property damage due to use of this tool or any compressed spring.
Print Settings:
I printed with Overture PETG, I'm not sure it matters too much.
This tool needs to be printed pretty solid. If you know how to block infill in your slicer, make sure the center of the tool, along the axis, is printed solid. If you don't know how to block infill, just print solid at 100% infill, it doesn't make too much difference for a part this small anyway.
If you print with the large flange down on the build plate, no support material is required.
LBRY Tags: recoil spring; tool; 3d printing; glock; sig p320