View this release
Alternative links
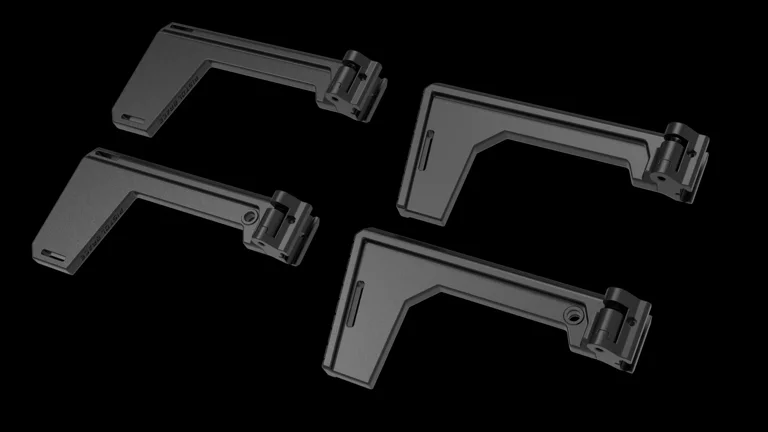
PDW S/B, Model 2: Laffs Dynamics
After over two years, I finally have gotten around to making the Model 2.
The hinge mechanism has remained largely the same, with the main difference being the folding arm and stock/brace sections have been merged
into a singular part. Overall, the design has been slimmed down, uses less material for manufacture, and in theory should take less time to
print.
The shoulder stock and pistol brace arms in the data pack contain variants with QD attachment ports.
Printer Used: Ender 3 V2
Filament Used: PLA+
Print Settings:
Extruder: 218C
Bed: 56C
First Layer Print Height: .2mm
Standard Layer Height: .16mm
Wall Thickness: .40
Wall Perimeters: 5+
Infill: 50%
Support Material Percentage: 20%
Hardware Needed:
1x M6x40mm Bolt
1x 8mm x 20mm Spring (Ender 3 Bed Spring)
1x M4 Nut
1x M4x30mm Bolt
Notes:
1) The M6x40mm bolt should simply pass through the hinge of the folding arm. Should the threads cut into the hinge, dremel out the
hole slightly until the bolt passes through. The bolt should only thread into the folding mech mount's top and bottom hinge points.
Be sure not to overtighten the bolt, otherwise the hinge points could flex and squeeze together, binding the folding arm and not allowing
it to articulate.
2) If the spring is too tight, simply cut off a coil to reduce pressure on the mechanism.
LBRY Tags: 3d printing; firearms; brace; stock; model 2